
How to connect a wallet to your React app using RainbowKit
Learn how to allow users to connect their wallet to your React application using RainbowKit and then interact with that wallet using Wagmi.
In this tutorial, we are going to learn how to allow users to connect their wallet to your React application using RainbowKit and then interact with that wallet using Wagmi.
RainbowKit is an excellent solution to connect wallets to your website because it supports all the major wallets, it's elegant and you can customise it (and it's free!).
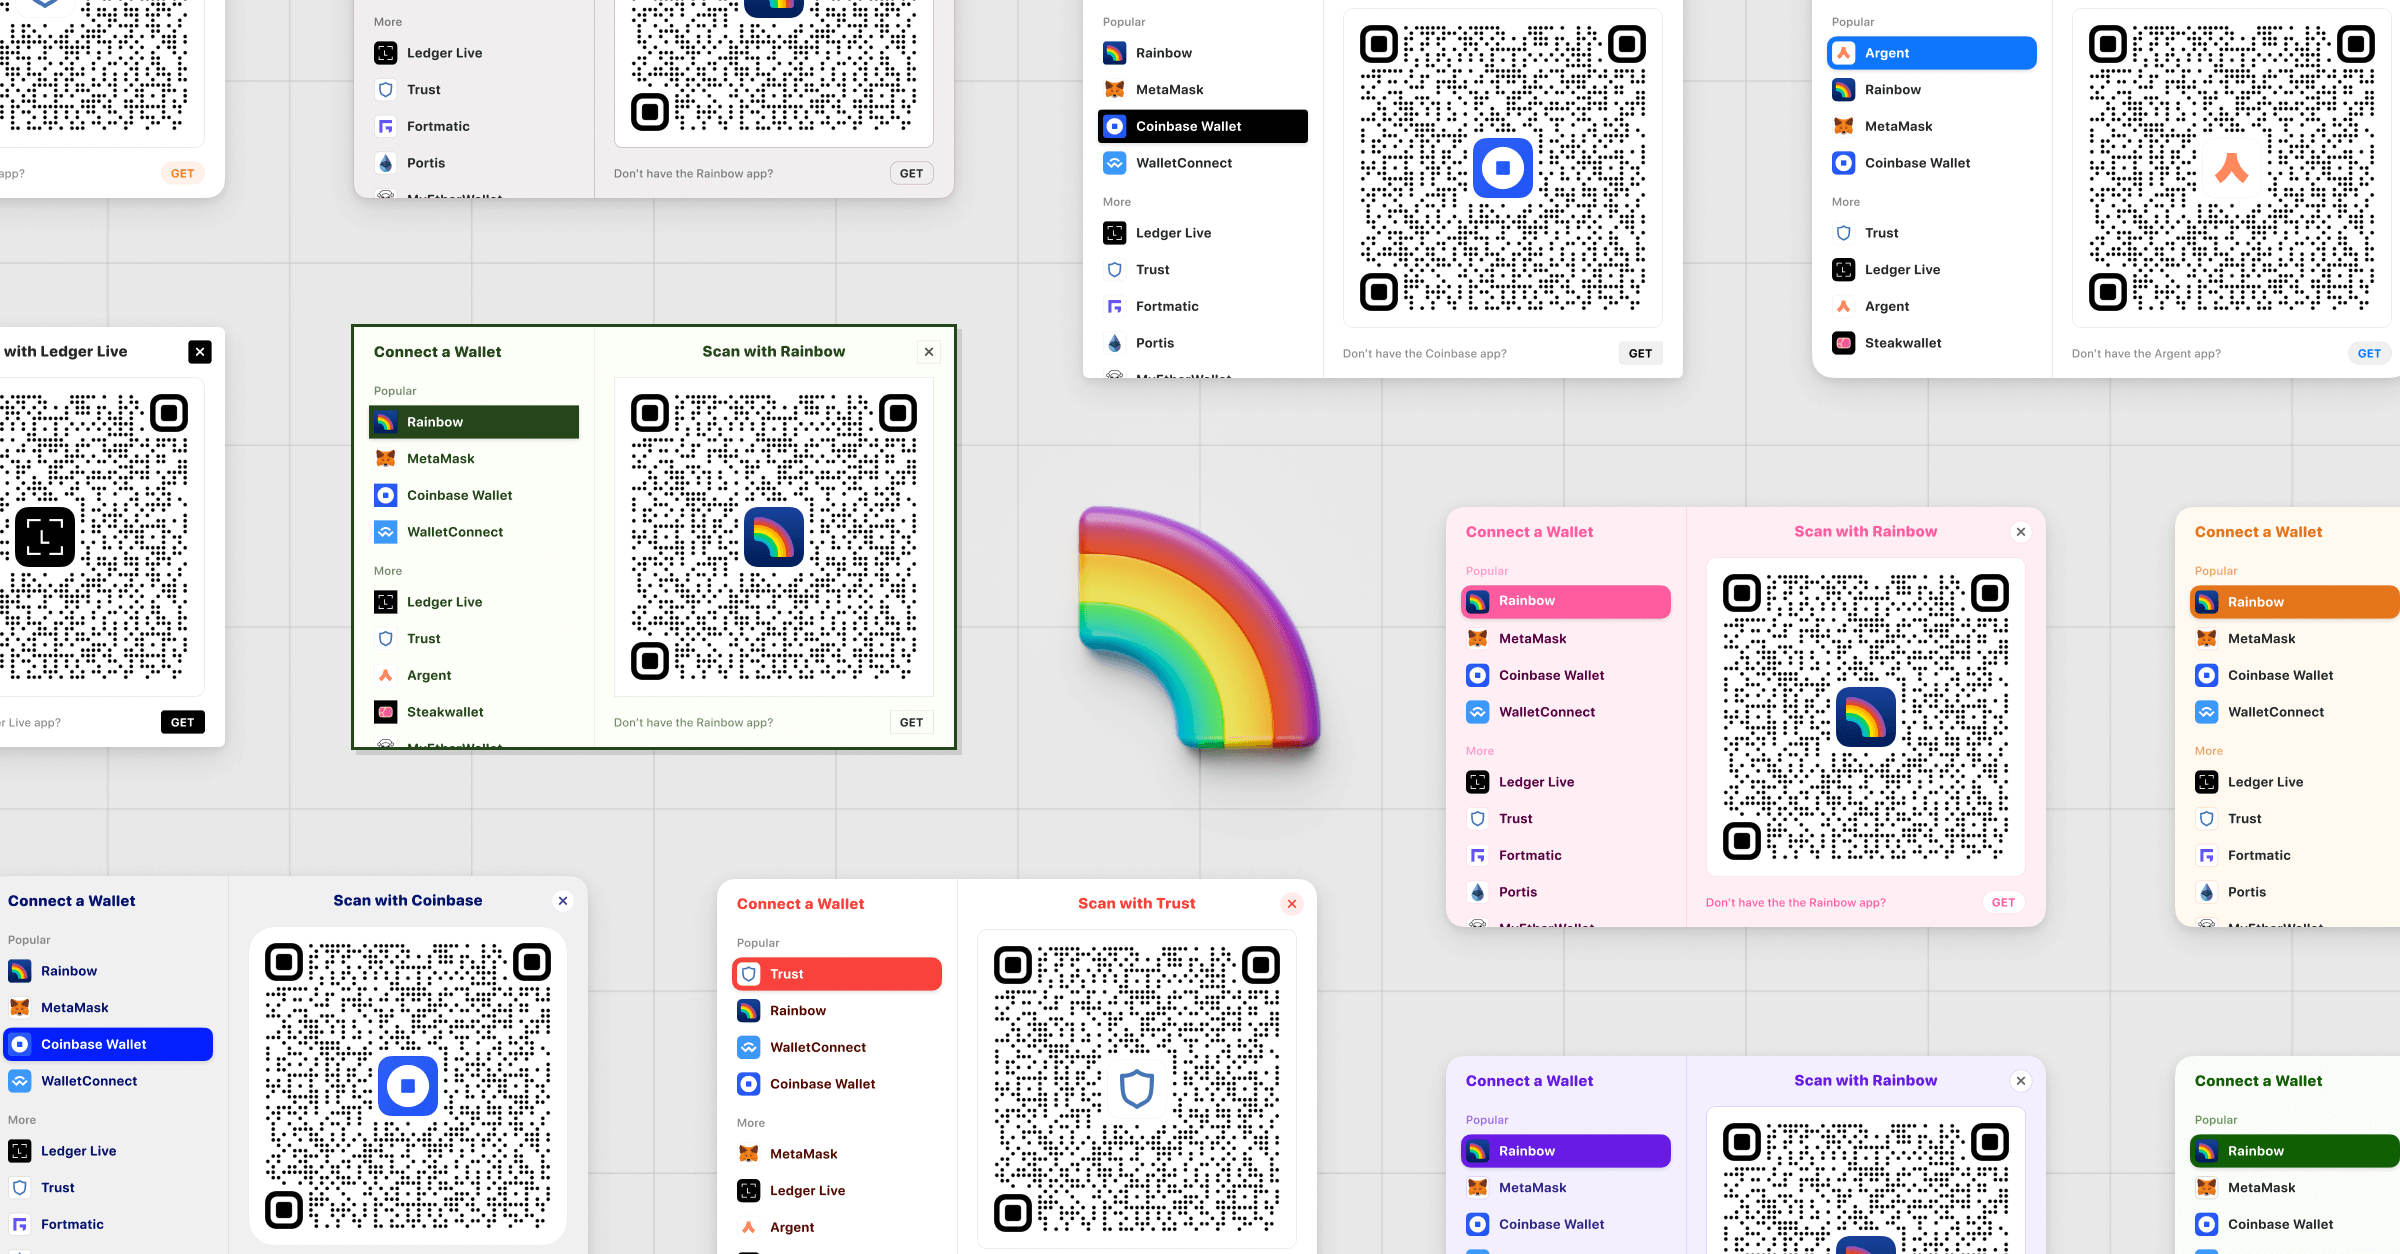
Here is a demo of what RainbowKit allows you to do and what it looks like without customisation:
Let's jump into the code
Installing the dependencies
The first thing to do is install the libraries that we need:
// with NPM
npm install @rainbow-me/rainbowkit wagmi ethers

// OR with Yarn
yarn add @rainbow-me/rainbowkit wagmi ethers
Configuring chains and providers
Next, you need to configure the chains that your app will interact with and the providers to interact with that blockchain.
Here is an example of how to do it:
import '@rainbow-me/rainbowkit/styles.css';

import { getDefaultWallets } from '@rainbow-me/rainbowkit';
import { chain, configureChains, createClient } from 'wagmi';
import { publicProvider } from 'wagmi/providers/public';

const { chains, provider } = configureChains(
  [chain.goerli],
  [publicProvider()]
);
To configure our chains and providers, we use the configureChains function. It takes 2 parameters, first an array that contains the chains that you want your app to use, and second, an array of providers to interact with these blockchains.
For the chains, you can import and use the default ones like this:
import { chain } from 'wagmi'And here is the full list of default blockchains: https://github.com/wagmi-dev/wagmi/blob/main/packages/core/src/chains.ts
For the providers, you can use the Alchemy API, the Infura API (you need to pass in an API key for both), the public providers that the blockchain created or a custom node that you run. Check out the providers section in the documentation to see how to use each provider and see how to add a custom chain.
In the example above, I use the public providers which is fine in development environments but in production you might run into rate-limiting issues.
I recommend using Infura, I've never had any issues with them and it's super easy to set up and use.
Creating the Wagmi client object
Next, we need to create a Wagmi client from our providers and chains.
import { getDefaultWallets } from '@rainbow-me/rainbowkit';
import { createClient } from 'wagmi';

const { connectors } = getDefaultWallets({
  appName: '0xDev Test',
  chains // created in the example above
});

const wagmiClient = createClient({
  autoConnect: true,
  connectors,
  provider // created in the example above
})
The difference here, compared to a normal Wagmi config, is that you don't use the connectors that Wagmi provides you. Instead, we use the connectors from RainbowKit.
Connectors are basically types of wallets that you allow users to connect to your website and that you can interact with using Wagmi.
For instance, you have a connector for MetaMask, Coinbase Wallet and others that you can find in the connectors section of the documentation.
To learn more about configuring your Wagmi client, check out the documentation here.
Wrapping your app in the providers
Now that you have your Wagmi client, you need to wrap your app in a WagmiConfig component and a RainbowKitProvider component:
// inside App.js

import { RainbowKitProvider } from '@rainbow-me/rainbowkit';
import { WagmiConfig } from 'wagmi';

// import your config or define it here

const App = () => {

    // ... rest of the code

    return (
        <WagmiConfig client={wagmiClient}>
            <RainbowKitProvider chains={chains}>
                {/* ... Rest of the app */}
            </RainbowKitProvider>
        </WagmiConfig>
    )
}
As you can see, we need to pass the wagmi client we created in the props of the WagmiConfig component and pass the chains we created to the RainbowKitProvider component.
The order is important here as RainbowKitProvider needs to be inside a WagmiConfig component.
Then, inside of the RainbowKitProvider you can put the rest of the code of your app.
Creating the connect button
RainbowKit provides a default connect button that works out-of-the-box, all you have to do is use the component. By default, it will look like in the video at the top of this article.
Here is how to use it:
import { ConnectButton } from '@rainbow-me/rainbowkit'

const SomeComponent = () => {
    return (
        <ConnectButton />
    )
}
Obviously, when that button is clicked, it will display the RainbowKit modal and allow users to connect their wallet.
Once a wallet is connected, the button changes and displays the address of the connected wallet and when users click on it they can disconnect their wallet or copy their address.
Customising the modal and buttons
If you want to change the styles and how the default button behaves, you can pass the following props to it:
label: the text of the buttonaccountStatus: allows you to tell if you want to display the avatar or the address (or both, or none of them) in the button when a wallet is connected.chainStatus: whether or not the logo and name of the blockchain should be displayed in the button after a wallet is connectedshowBalance: whether or not the account balance should be displayed in the button after a wallet is connected
You can find more information and examples in RainbowKit's documentation here: https://www.rainbowkit.com/docs/connect-button#props
If you want to go further and create your own button, you can use the useConnectModal hook that returns a function to open the modal. So to create your own button, you can just create a normal button and when that button is clicked, you call that function.
Here is an example:
import { useConnectModal } from '@rainbow-me/rainbowkit';

const MyConnectButton = () => {
    const { openConnectModal } = useConnectModal();

    return (
        <button onClick={openConnectModal}>Connect Wallet</button>
    )
}
And since it's a normal button, you can style it the way you want and do whatever you want.
Now, if you want to make a custom button but still use a part of the default behaviour, you can use ConnectButton.Custom. This is a bit complex and it would be long to explain here so it that's what you want to do, check out the documentation here:
If you want to customise the modal, you don't have much choice.
You can change the size of the modal by passing the modalSize prop to the RainbowKitProvider. You can either pass "compact" or "wide" which is the default value.
If you pass "compact", the modal will be like in the demo video at the top of the article but without the right part of the modal. It will just be a list of wallets and display the QR codes if you press on the corresponding wallet.
To change the colors and styles, you can pass a theme prop to the RainbowKitProvider component.
There are 3 default themes, lightTheme, darkTheme or midnightTheme. You can either use their default styles or override them as explained here: https://www.rainbowkit.com/docs/theming#customizing-the-built-in-themes
You can also create your own theme if you want. For that, check out this section in the documentation:
Interacting with the connected wallet
Now, to interact with the connected wallet, you can use all the hooks that Wagmi provides. You can find these hooks here:

And that's it 🎉
Thank you for reading this article

