
How to connect a wallet to your React app using Web3Modal V2
In this tutorial, we are going to learn how to connect a wallet to your React app using the Web3Modal library (v2) and Ethers JS. It supports all the major wallets, it's elegant and you can customise it (and it's free!).
In this tutorial, we are going to learn how to connect a wallet to your React app using the Web3Modal library (v2). It supports all the major wallets, it's elegant and you can customise it (and it's free!).
Here is how it looks like, with the default styles and configuration, I didn't customise anything here:
To do that, the first step is to create an account on WalletConnect to get a project ID here:
On that website, you need to create a new project by clicking on the button at the top right corner:

To create a new project you just have to enter a name for that project. It can be whatever you want.
Once you have a new project, you can copy the project ID that they give you:
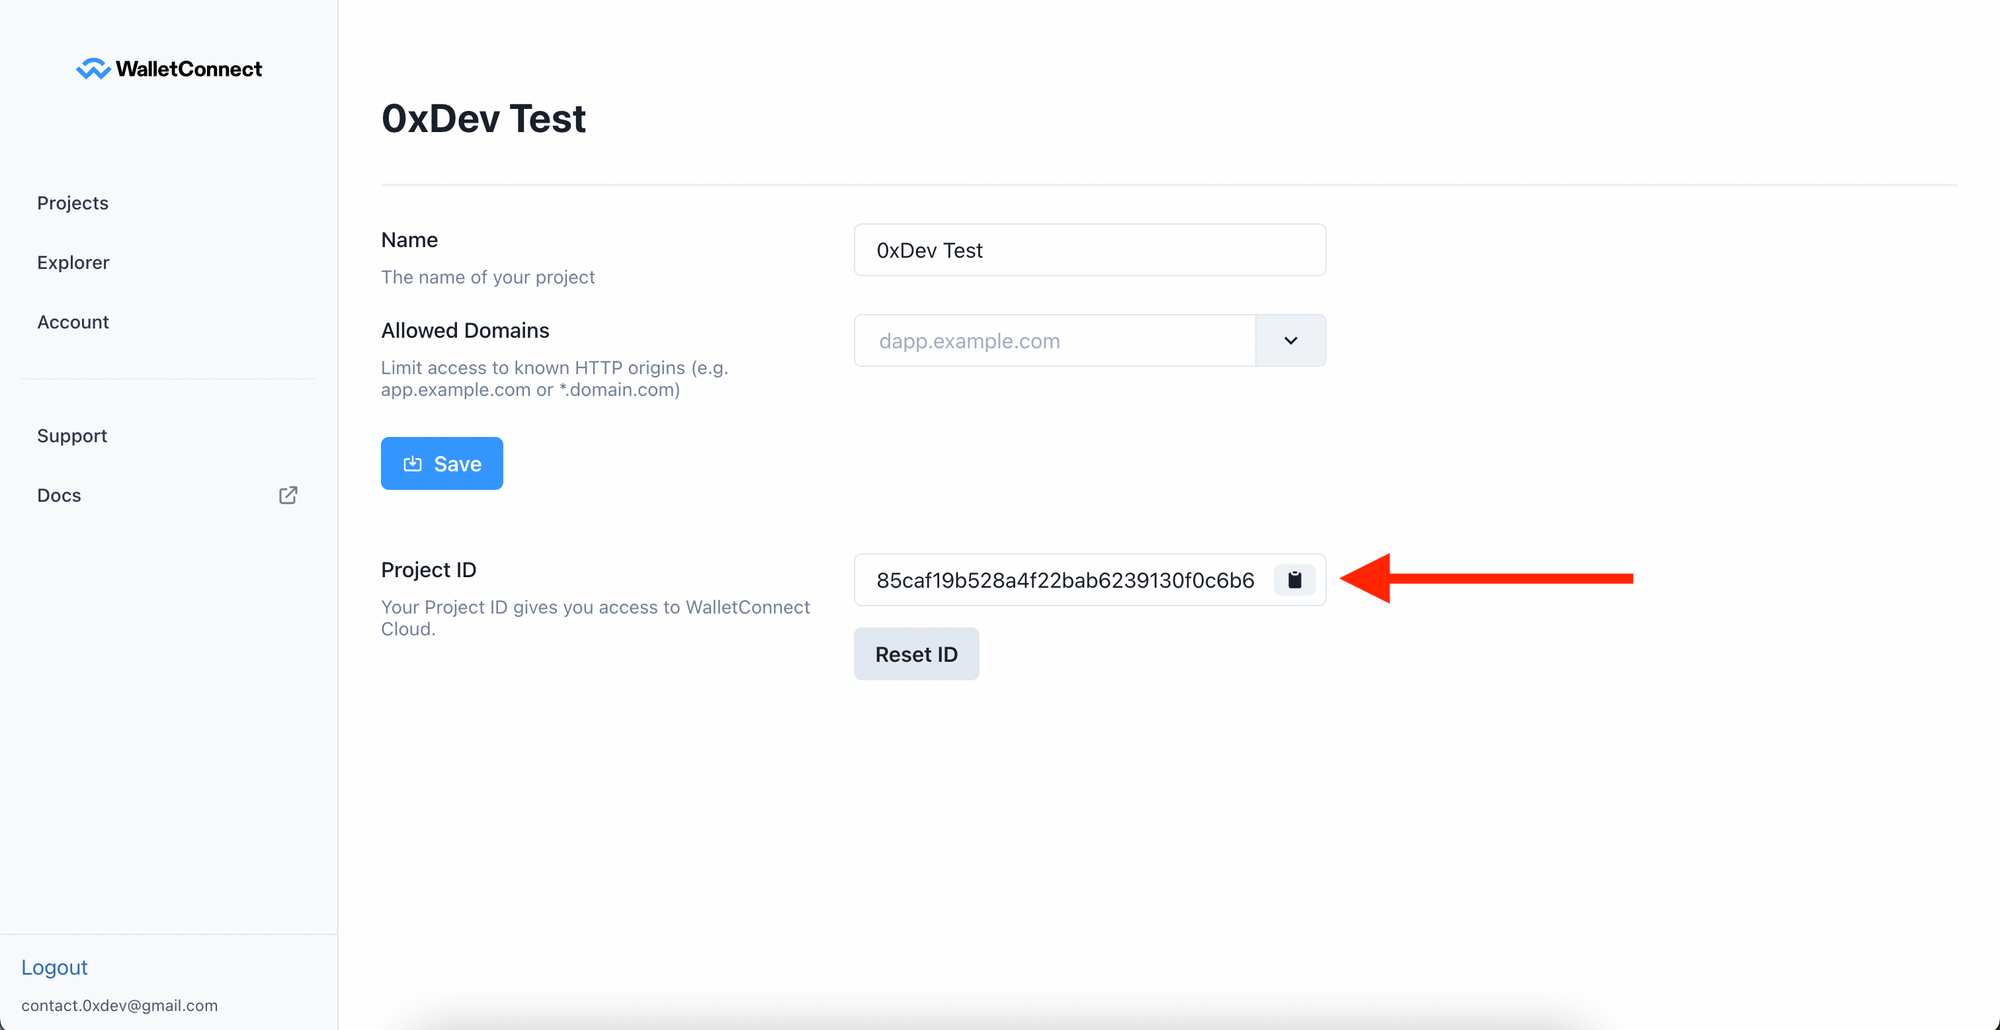
You can store that key wherever you want, I put it in a .env file so it's in the environment variables and I can easily switch the project ID without changing the code (especially when the website is deployed). You can also hardcode it in the code if you want.
Now the next step is to install the libraries that we're going to use. We need to install 2 Web3Modal libraries and EthersJS.
So in the terminal, run:
npm install @web3modal/react @web3modal/ethereum ethersYou can also use Yarn if you want.
Now, let's go to the code and create an object that is going to hold the configuration of Web3Modal.
Here is what a basic config object looks like:
const config = {
  projectId: "YOUR_PROJECT_ID_HERE",
  theme: 'dark',
  accentColor: 'default',
  ethereum: {
    appName: 'YOUR_APP_NAME',
  },
};
That object has the following properties:
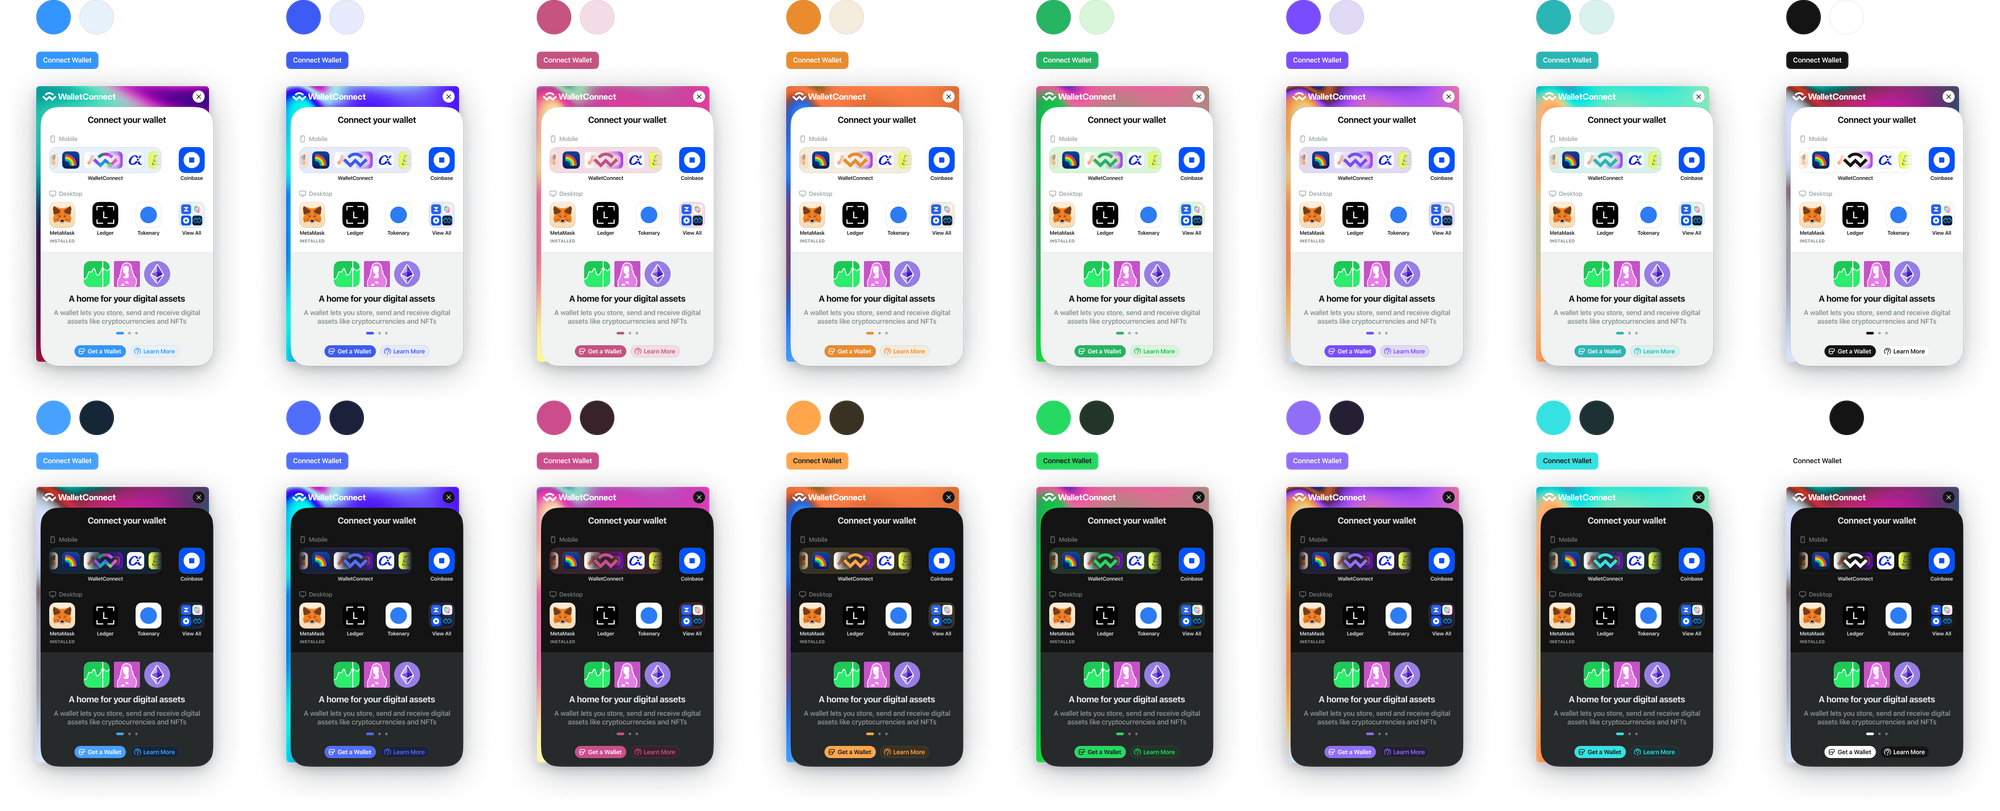
projectId: the project ID you got after creating an account and a project as explained abovetheme: either"dark"or"light", it will change the background color of the modal to be either dark or light.accentColor: the color used for buttons in the modal and other elements that stand out. It can beblackWhite,blue,default,green,magenta,orange, ortealbut more will be added. The screenshot below shows you what each accent color looks like in the modal
ethereum: an object to configure the modal to connect an Ethereum wallet. This property is there because they will add the Solana network soon.
The Ethereum property contains an object that has 4 properties:
appName: (required) the name of your app (it can be anything)autoConnect: (optional) a boolean indicating wether or not to cache the connection of a user and automatically re-connect them when they come back to the websitechains: (optional) an array that contains all the blockchains your app supports. By default, it only has the Ethereum mainnet. The chains you can use are defined in these 2 lists:
• The ones added by Wagmi by default (the library used by Web3Modal)
• The ones added by Web3Modal on top of Wagmiproviders: (optional) an array that contains the providers to use to interact with the blockchain. Blockchains provide public URLs that you can use as providers and these URLs are the default providers. Check out this section in the documentation to add your own custom providers: https://wagmi.sh/docs/providers/configuring-chains.
You can use these ones by default, but if you use services like Infura or Alchemy you'll have to pass an API key and if you use your own custom RPC URL, you'll have to configure the provider correctly.
Now, we need to add a <Web3Modal /> component inside our App because it needs to be at the root level of our app. In the props of the Web3Modal component, we pass the config object we created above:
import { Web3Modal } from '@web3modal/react';
import { chains } from '@web3modal/ethereum';

// Your config here:

const config = {
  projectId: process.env.REACT_APP_WALLET_CONNECT_PROJECT_ID,
  theme: 'dark',
  accentColor: 'default',
  ethereum: {
    appName: '0xDev-Test',
    chains: [chains.goerli] // use the goerli testnet
  },
};

function App() {
  return (
    <div className="App">
      <Web3Modal config={config} />
    </div>
  );
}

export default App;
Then, to create a button for people to connect their wallet, you can either use the default button with the default styles:
// inside any component, you can use the ConnectButton to display a button for users to connect their wallet

import { ConnectButton } from '@web3modal/react';

export const Home = () => {
  return <ConnectButton />;
};
This will display a button like the one in the video at the top of this article.
If you want to make a custom button, with your own styles and features, you can simply create a button and when that button is clicked, you call the open function.
That open function is returned by a hook called useConnectModal. Here is how to use it:
// inside any component, you can use the ConnectButton to display a button for users to connect their wallet

import { useConnectModal } from '@web3modal/react'

export const Home = () => {
    const { isOpen, open, close } = useConnectModal()

    return <button onClick={open}>Connect wallet</button>;
};
That hook also provides a close function to close the modal and an isOpen boolean to check if the modal is open or not.
Now you can style that button the way you want and display the text you want.
Once you have that button to connect wallets to your website, Web3Modal provides hooks from Wagmi to allow you to interact with the blockchain and with the user's wallet.
All the hooks that you see in Web3Modal's documentation come from Wagmi, the only difference is that if you use Web3Modal, you import the hooks from @web3modal/react instead of from wagmi.
Here is the list of all the hooks that you can use to get data from the user's wallet and from the blockchain (from contracts or the blockchain itself):
 WalletConnect
This is the list to send transactions to the blockchain from the user's wallet (send Ethereum, send tokens, call smart contract functions that create transactions or stuff like that):
WalletConnectAnd here is the link to Wagmi's documentation:

And that's it 🎉
Thank you for reading this article

