
How to connect a wallet to your website using Web3Modal
In this tutorial, we are going to learn how to connect a wallet to your website using the Web3Modal library with React and JavaScript.
In this tutorial, we are going to learn how to connect a wallet to your website using the Web3Modal library with React and JavaScript.
Using that library, you will be able to display a modal that will ask the user what wallet he wants to connect to your website from a list that you can configure. Here is how it will look like:
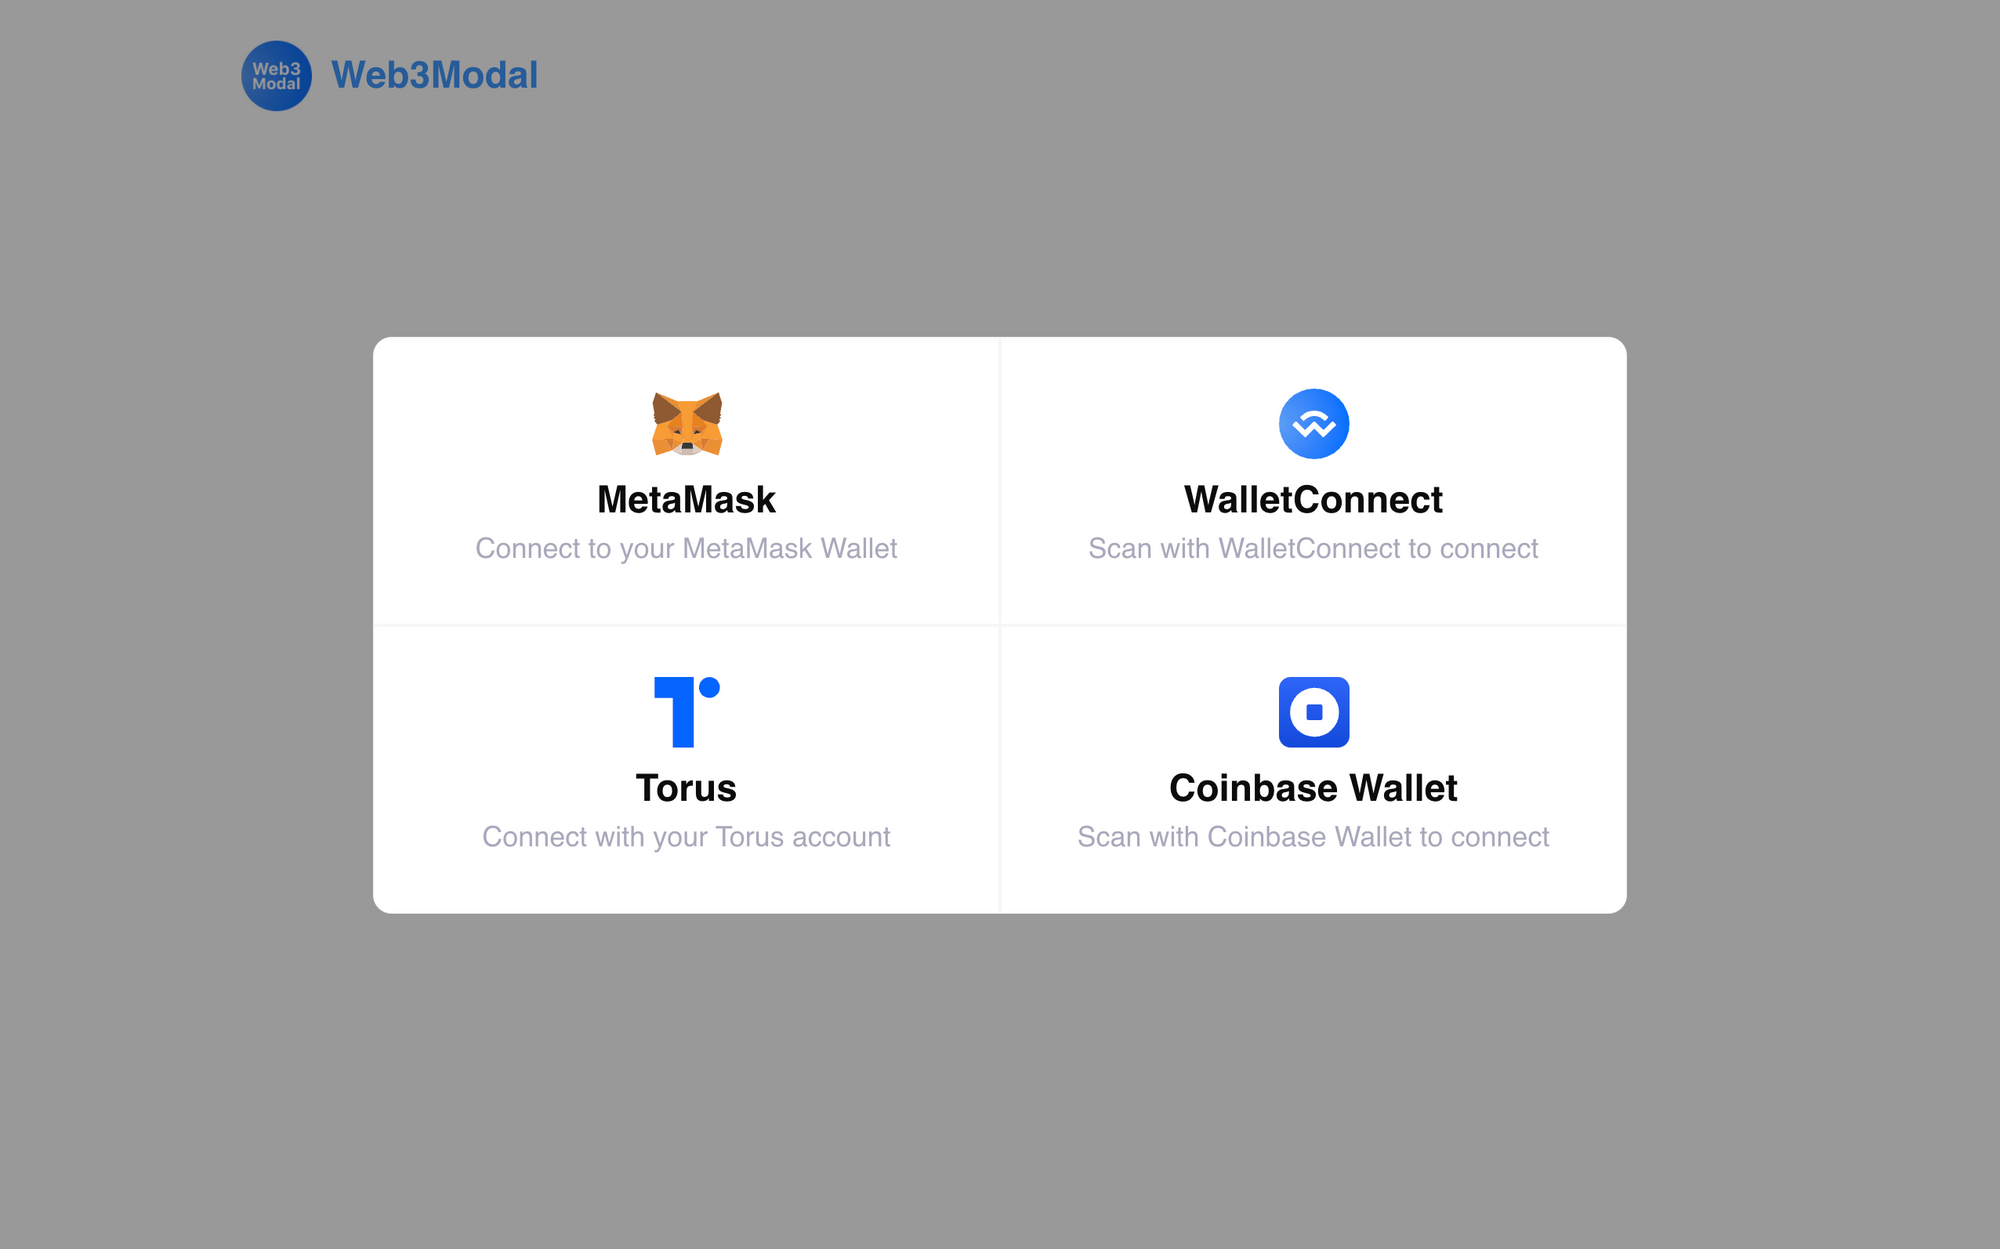
As you can see, all the major wallets are supported. Using Web3Modal, you will be able to connect the following wallets to your website:
- MetaMask
- WalletConnect (this includes all mobile wallets like TrustWallet or Argent)
- Torus
- Coinbase Wallet
- Fortmatic
- Binance Chain Wallet
Install the libraries
The first step is to install the libraries we will need:
npm install web3 web3modalThen, depending on the wallets you want to display, you will need to install a few other libraries.
Here we are going to focus on the most popular wallets only. We are going to learn how to connect a MetaMask wallet, a Torus wallet, a Coinbase wallet, a Formatic wallet, a Torus wallet and we will also learn how to connect through WalletConnect.
For that, we will need to install the following libraries as well:
npm install @walletconnect/web3-provider @coinbase/wallet-sdk fortmatic @toruslabs/torus-embedYou can see all the provider options for all the available wallets here:
 WalletConnect
Create the provider options for the wallets used in Web3Modal
To use the Web3 Modal, we will need to configure the providers options for some of the wallets. For example, MetaMask won't need any provider options but Coinbase Wallet will.
Here are the provider options we will need to integrate WalletConnect in Web3Modal:
import WalletConnectProvider from '@walletconnect/web3-provider';

const walletConnectOptions = {
    package: WalletConnectProvider, // required
    options: {
      infuraId: "YOUR_INFURA_ID_HERE", // required
    },
}
As you can see it in the code, you will need to create an account on infura.io (which is totally free). Then you need to go to the dashboard and create a new key. Next, on the list of keys you create, click on the one you want to use, then click on "Manage Key" and copy your API key. Don't copy a full URL, just the API Key and pass it to the provider options above.
Next, the options for Coinbase Wallet:
import CoinbaseWalletSDK from '@coinbase/wallet-sdk';

const coinbaseWalletOptions = {
    package: CoinbaseWalletSDK, // Required
    options: {
        appName: '0xDev', // Required
        infuraId: "YOUR_INFURA_ID_HERE", // Required
        chainId: chainId, // Optional. It defaults to 1 if not provided
    },
}
Just like above, you are going to need an Infura ID. Here, you will also need:
- an
appName– the name of your app - a
chainId– the ID of the network you are using. Go to chainlist.org to see the full list of all the EVM networks and their IDs
Now the provider options for Formatic:
import Fortmatic from 'fortmatic';

const fortmaticOptions = {
    package: Fortmatic, // required
    options: {
        key: 'pk_test_YOUR_PK_HERE', // required
    },
}
As you may have noticed, you are going to need a Fortmatic private key for this. You can get yours by going to https://dashboard.fortmatic.com/login and create an account if you don't have one and then grab your private key from the dashboard.
The provider options for Torus:
import Torus from '@toruslabs/torus-embed';

const torusOptions = {
    package: Torus, // required
    options: {
        networkParams: {
            chainId: chainId,
        },
    },
}
Like above, you'll need to provide a chain ID. For Ethereum, it would be 1 and for other networks, you can see the full list here: chainlist.org
And finally, the provider options for Binance Chain Wallet:
const binanceChainWalletOptions = {
    package: true,
}
Now, we put it all together in the same object:
const chainId = 1

// create individual provider options objects with the code snippets above

const providerOptions = {
    walletconnect: walletConnectOptions,
    coinbasewallet: coinbaseWalletOptions,
    fortmatic: fortmaticOptions,
    torus: torusOptions,
    binancechainwallet: binanceChainWalletOptions,
});
Display the Web3Modal and connect a wallet to your website with React
Now that the providers and their options are configured, we can display the modal and ask the user to connect a wallet to your website.
Here is the code to do that with React:
import React, { useState } from 'react';
import Web3 from 'web3';
import Web3Modal from 'web3modal';

// create provider options here using the code above

const ConnectWalletButton = () => {
    const [web3Account, setWeb3Account] = useState();
    const [web3, setWeb3] = useState();


    const onConnectClick = async () => {
        const web3Modal = new Web3Modal({
            disableInjectedProvider: false,
            cacheProvider: false, // optional
            providerOptions: providerOptions, // required
        });

        const provider = await web3Modal.connect();
        const web3 = new Web3(provider);
        const accounts = await web3.eth.getAccounts();

        setWeb3(web3);
        setAccount(accounts[0]);
    }

    return (
        <div>
            {account ? (
              <button onClick={onConnectClick}>Connect a wallet</button>
            ) : (
              <p>Connected with {account}</p>
            )}
        </div>
    )
}
The code above displays a button when the user is not connected and displays the address that is connected to the website when a wallet is connected.
When the user presses the Connect a wallet button:
- we create a
Web3Modalinstance using the provider options we created above and we explicitly say that we want to have the default injected providers (meaning MetaMask) and we disable caching providers so when the user clicks on the button, it always shows the modal and doesn't connect to the previously connected wallet - we display the modal using the
.connectfunction andawaitfor it - the
.connectfunction returns a provider that you can use to create aWeb3instance - with the
Web3instance, we get the address of the connected account usingweb3.eth.getAccounts - we set the address and the web3 instance to the state so we can re-use it later
To improve the code above, you can wrap the await web3Modal.connect(); part in a try ... catch block so you handle the case where the user doesn't connect a wallet or the connection failed.
And you can also do it for the getAccounts function so you handle when that call fails (which shouldn't happen if there is a wallet connected).
Then, you can do whatever you want with the Web3 instance such as sending transactions or anything else that the library supports!
If you want to learn how to send a transaction with Web3 and JavaScript (works also for React), check out this tutorial:
Display the Web3Modal and connect a wallet to your website with vanilla JavaScript
First, you won't install the libraries like we did above. Instead, you are going to need this code in the <head> tag of your html code:
<script type="text/javascript" src="https://unpkg.com/web3@1.2.11/dist/web3.min.js"></script>

<script type="text/javascript" src="https://unpkg.com/web3modal@1.9.0/dist/index.js"></script>

<script type="text/javascript" src="https://unpkg.com/@walletconnect/web3-provider@1.2.1/dist/umd/index.min.js"></script>

<script type="text/javascript" src="https://unpkg.com/fortmatic@2.0.6/dist/fortmatic.js"></script>

<script src="https://unpkg.com/@toruslabs/torus-embed"></script>

<script src="https://unpkg.com/@coinbase/wallet-sdk"></script>
Using that, you won't have to import everything like we did above. All the imports above will have the same names as above but they will be under the window variable.
For example:
-
Formaticwill be accessed withwindow.Fortmatic Web3Modalwill be accessed withwindow.Web3Modal
Then, you can display the modal and connect a wallet to your website using this code:
<html>
  <head>
    <title>Web3modal example</title>
    <meta name="viewport" content="width=device-width, initial-scale=1.0">
  </head>
  <body>
    <button class="connect-btn" id="btn-connect">
        Connect wallet
    </button>
    <p id="connected-account"><p>

    <script>
      const Web3Modal = window.Web3Modal.default;

      const providerOptions = {
        /* Use code above */
      };

      const web3Modal = new Web3Modal({
        disableInjectedProvider: false,
        cacheProvider: false, // optional
        providerOptions // required
      });

      let web3;

      document.getElementById("connect-btn")
      .addEventListener("click", async () => {
          const provider = await web3Modal.connect();
          web3 = new Web3(provider);
          const accounts = await web3.eth.getAccounts();

          document.getElementById("connected-account")
          .innerHTML = "Connected with " + accounts[0]
      })
    </script>
  </body>
</html>
In the code above, we display a "connect wallet" button that when pressed, displays the Web3Modal and asks the user to connect a wallet to your website. Once a wallet is connected, we display the address of that account.
We create a Web3Modal instance using the desired provider options we say that we want to have the default injected providers (meaning MetaMask). We also disable caching providers to always display the modal and not cache the connected wallets.
When the button is pressed:
- we display the modal using the
.connectfunction andawaitfor it to receive a provider - using the provider returned by the
.connectfunction, we create aWeb3instance - with the newly created
Web3instance, we get the address of the connected account usingweb3.eth.getAccounts
Now, using that Web3 instance, you can do whatever you want with the connected account! For example, you can send ERC-20 tokens from the connected wallet. To learn how to do that, check out this tutorial:
And that's it! 👏
Thanks for reading this article!

