
How to swap ERC-20 tokens using JavaScript and React
In this guide, we are going to learn how to swap ERC-20 tokens using only the web3 js library.
In this guide, we are going to learn how to swap ERC-20 tokens in Javascript and React and learn how to integrate Uniswap's swap widget.
ERC-20 smart contracts don't come with a built in function to buy or sell the token in exchange of ETH or another token.
However, there are decentralised trading protocols that allow us to do just that through their interface.
On the Ethereum network for example, we have Uniswap. On the Binance Smart Chain, we have PancakeSwap.
Here, we're going to focus on Ethereum and Uniswap but you can apply this guide to other platforms as they all fork Uniswap – meaning they copied the code and adjusted it to the blockchain they want and the UI they want but the underlying mechanism is the same.
Note that if you are working your own custom token, you'll have to provide liquidity. That means you have to create a pool where you put your tokens and ETH so people can buy or sell your tokens from that pool on Uniswap.
With that being said, let's dive in!
Integrate Uniswap's swap widget
The most straightforward solution is just to integrate the Uniswap swap widget into your website so you don't have to re-write all the code and your users can swap their tokens through Uniswap directly on your website.
There's also a chance that your users are already familiar with that interface and they have maybe already interacted with it in the past.
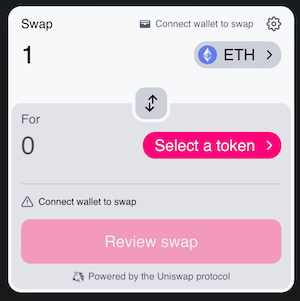
At the time of writing this guide, the widget looks like this. The UI might change in the future:
To integrate that in your website, the first step is to install the Uniswap widget library and react-redux :
npm install --save @uniswap/widgets react-redux(you can also use yarn to install it)
Next, all you need to do is add the widget component in your React app:
import { SwapWidget } from '@uniswap/widgets'
import '@uniswap/widgets/fonts.css'

function App() {
  <div className="Uniswap">
    <SwapWidget />
  </div>
}
That's it!
For now, you can only use it on React websites. Maybe in the future they will support other frameworks and vanilla JS.
If you want to customise that widget, have a look at their documentation, everything is explained:


To customise it, you can pass a width in the props and a theme. The theme is an object that contains the configuration of the style.
For example you can pass the following properties in the theme object:
borderRadiusfontFamily- the colors used with the
accent,primaryandsecondaryproperties and other colors that you can see here: https://docs.uniswap.org/sdk/widgets/swap-widget#customizing-theme
I strongly recommend you check out this part of the documentation if you want to customise it.
You can also import the darkTheme or lightTheme from '@uniswap/widgets' and pass one of them in the theme prop of the SwapWidget.
And that's it! 🎉
Thanks for reading this article!

